Building My Personal Website – From Domain to Deployment
For a long time, I had this thought in the back of my mind — I need a personal website. Not a complex portfolio, just a simple space to write, keep notes, and share what I learn. I kept postponing it, overcomplicating the setup in my head. Recently, I decided to just build it, ship it, and improve it later.
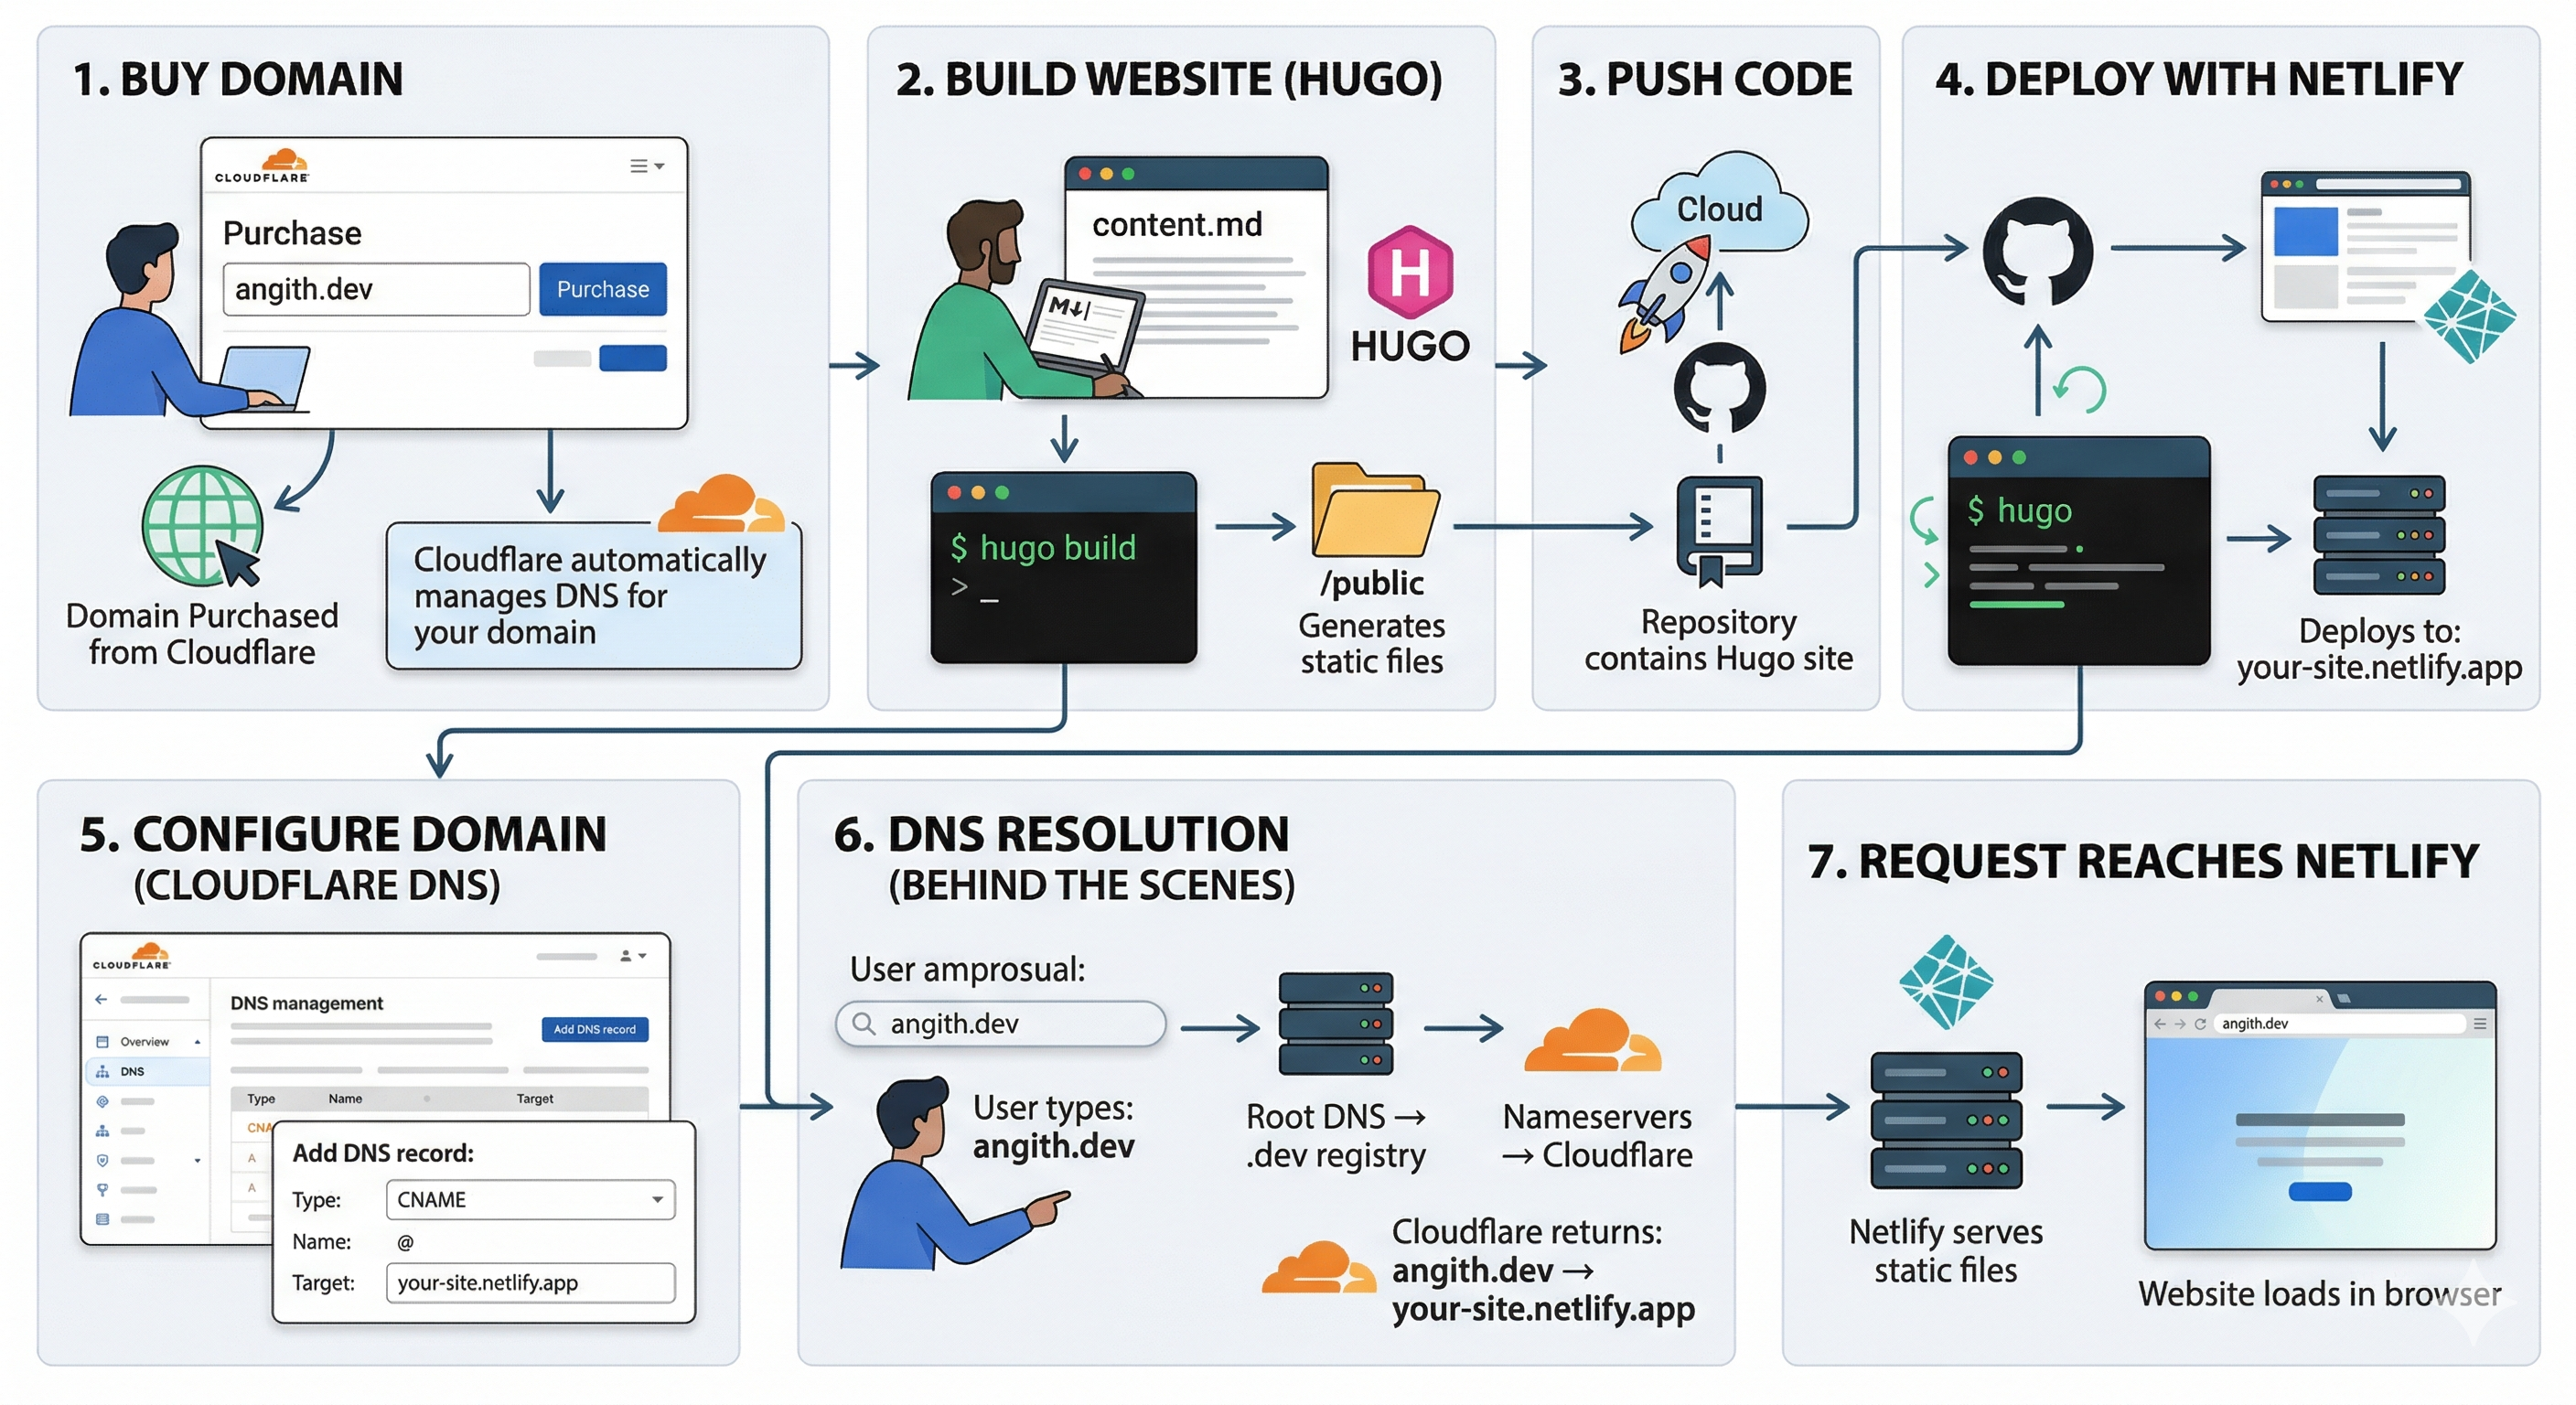
To visualize the process, I drew up a quick workflow diagram outlining how all the different pieces fit together, from buying the domain to deploying the live site:
The Architecture and Tech Stack
The first step was getting a domain. I wanted something clean and short, so I
registered angith.dev through
Cloudflare. I chose
Cloudflare because their domain registration is priced at cost, without the
annoying upsells you see elsewhere.
With the domain secured, I had to decide on the tech stack. While I briefly considered building a full React application, I realized I didn’t want to maintain a backend or database for a content-driven site. That led me to static site generators, and I ultimately chose Hugo. Hugo is built in Go and its workflow is frictionless: write Markdown, run the build, and deploy the static files. There are no runtime dependencies or database overheads, which is exactly what I wanted.
Building with Hugo
Since I didn’t want to build the CSS and layout from scratch, I started out with the PaperMod theme. I added it to my project as a submodule:
git submodule add https://github.com/adityatelange/hugo-PaperMod themes/PaperMod
PaperMod provided a solid base with a clean layout and sensible defaults. I kept
the site structure simple with sections for Home, Blog, TIL, Projects, and
Portfolio. Inside the project, this maps cleanly to content/blog/,
content/til/, and so on.
As I used the theme, I naturally wanted to customize the homepage layout,
navigation, and spacing. Instead of modifying the theme directly—which creates
drift and makes upstream updates painful—I leveraged Hugo’s template overriding
mechanism. By adding my own templates (like baseof.html and list.html) to
my root layouts/ folder, Hugo prioritized them over the theme’s templates.
Over time, I replaced enough of the template logic that I completely dropped
the submodule and kept my adapted version directly in the repository.
Deploying to Netlify
For deployment, I connected my GitHub repository to Netlify so that builds happen automatically.
I went to Netlify and chose “Add new site → Import from Git”, selected GitHub, gave the required permissions, and picked my repository. The setup was straightforward, and Netlify automatically detected that it was a Hugo project.
However, the first build failed with the error bash: hugo: command not found.
Even though Netlify detected the project correctly, the Hugo binary wasn’t
available in the build environment by default. That’s why the build failed.
To fix this reliably across builds, I added a netlify.toml file to the root
of my repository to explicitly define my local Hugo version (0.157.0 Extended):
[build]
  command = "hugo"
  publish = "public"

[build.environment]
  HUGO_VERSION = "0.157.0"
Once I pushed this configuration, Netlify installed the exact version I needed, and the site built successfully.
The final step was mapping my Cloudflare domain to Netlify. I added a CNAME
record targeting my .netlify.app domain. An important detail here is to omit
any protocol, like http://, or trailing slashes in the target field.
When I tried to visit the live site in Chrome immediately after, it blocked
access with an ERR_CERT_COMMON_NAME_INVALID error. This happens because
Netlify provisions SSL certificates dynamically via Let’s Encrypt, and
Chrome’s strict HSTS policy blocks sites without a verified TLS cert. After
a few minutes of waiting for the DNS to propagate and the certificate to
attach, the site loaded perfectly.
Final Thoughts
Getting this website live confirmed that starting simple beats perfect planning. If you are thinking about building your own personal site, don’t overthink the tech stack or the design upfront. Pick lightweight tools, set up an automated deployment pipeline, get it live, and refine it through iteration. Now that the core system is ready, I can focus on my actual goals: refining the design, adding more TIL entries, and writing consistently.